25 Nov 2018

TEXAS STATE FAIR CORN DOGS

Texas State Fair Style

The Dallas state fair started in 1886 and has continued every year since, around 1930 is when it is claimed two brothers ditched the hot dog bun, stuck the hot dog on a stick, dipped it in corn batter, fried it and Ta-Da...The iconic corn dog that is loved by so many was born.  My love of jalapeño corn bread has lead me to add fresh diced jalapeños to this corn batter recipe making theses corn dogs awesome.


Ingredients 
(makes 6)

6 beef hot dog sausages
300g fine ground corn meal
300g plain flour
2 tsp baking powder
1 tbsp mustard powder
1 fresh jalapeño chopped
1/2 tsp of salt
1/4 tsp of sugar
2 beaten eggs
200ml water2 ltr nut oil for frying

In a bowl mix the flour, corn meal, salt, baking powder, sugar and mustard together, make a well in the centre and pour in the beaten egg, add approx 100ml of water and whisk well, add more water if needed, you want the batter to be quite thick, like porridge.

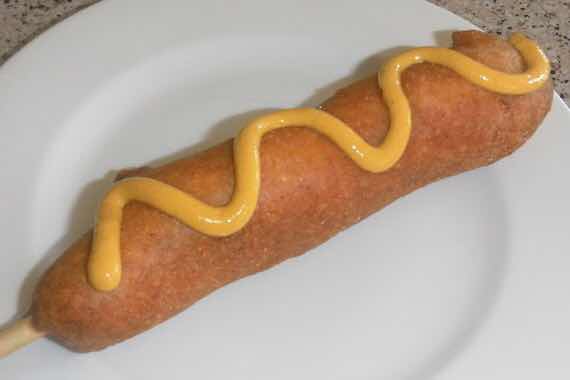
Take the hot dogs and push a large skewer or chopstick three quarters of the way through the hot dogs, dust the hot dogs in some of the dry polenta, this will help the batter to stick to the sausage.  There is an art to getting the corn batter to stay on the hot dog, if you make extra batter it is easier to place the batter in a tall glass and then dip the hot dog into the batter and place straight in to the fryer, this is the easiest and most successful way, however if like me you only make up the one batch of batter I rolled the hot dog in the batter and used a spatula to trowel on extra batter, fry for approx 5 minutes at 375 F / 190 C degrees turning regularly, drain and serve hot with ketchup and mustard.

20 Nov 2018

CHIPOTLES EN ADOBO

This is my new best friend in the kitchen, just a teaspoon added to any dish gives a underlying tone of awesome flavour a slightly sweet, smokey kissed flavour.  This sauce is so versatile, a teaspoon in mayonnaise makes a great elevator for any sandwich, marinate steak, chicken, pork and fish, add a spoonful to your pasta this flavour booster is never ending.

Prep time 5 minutes / Cooking Time 40 minutes


Ingredients 
(makes 1 jar)

Chipotles en adobo Sauce
25 dried chipotles stem removed
1 tbsp olive oil
1 onion finely diced
4 cloves garlic chopped
1 tbsp fresh oregano, 1/2 if dried
1 tsp fresh thyme 1/2 if dried
1 fresh bay leaf
1/2 tsp cumin seeds toasted, crushed
120ml white wine vinegar
25ml balsamic vinegar
1 tbsp tomato purée 
1 tbsp palm sugar
1/2 tsp Himalayan sea salt 

In a pan cover the chipotles with water and bring to a simmer, cook for 30 minutes until soft.  Remove the chillies from the pan and keep the flavoured simmering water.  In a blender blitz the onion and garlic, herbs, cumin, the softened chipotles along with 100ml of the simmering water, blitz to a paste.  Heat a pan, add the olive oil until hot, then the paste, fry for a couple of minutes stirring so as not to let the sauce catch on the bottom of the pan.  Add the vinegar, tomato purée, sugar, salt, bay leaf and 50ml of the simmering water to the pan stir in and simmer for another 10 minutes or so until you have a thick sauce.  Store in clean dry sterilised ball mason jar in the fridge.

18 Nov 2018

LO-DOUGH GLUTEN FREE WOOD FIRED PIZZA

Pizza is so Back on the Menu !!!
There is good reason why wood fired pizza’s are some of the best you can eat, the flavour that comes from cooking with open flame is unbeatable.  This awesome gluten free, carb free Lo-Dough wrap is unbelievably versatile, so good that even my husband is converted, something I did not expect.  Cooking In a wood fired oven just adds a whole other level of flavour, it wasn’t that long ago that everyone cooked over wood fires.  The fast wood fired cooking and high temperatures give you a mouthwatering crisp gorgeous oak smoked licked pizza.

I make my Italian five families Marinara recipe base tomato sauce with the most gorgeous full of sunshine flavour DOP San Marzano tomatoes, these are grown on the slopes opposite Mount Vesuves in Valle del Samo Italy.  Simple toppings of DOP di bufala campagna mozzarella and fresh basil leaves makes for a magnificent Margarita pizza, however the calling for some pepperoni was just to strong on this occasion!

Pizza...Pizza...Pizza


Ingredients
(makes 4 pizzas)

Lo-Dough 
4 Lo-Dough wraps
San Marzano Marinara Sauce
1 large tin DOP san Marzano tomatoes
100 ml olive oil
1 onion finely chopped
1 clove garlic grated
1/2 red pepper finely chopped
1/4 glass of quality dry white wine
1/4 glass quality dry red wine
1/2 tsp Himalayan sea salt
1 tsp oregano
1/4 tsp thyme
1/4 tsp paprika 

Toppings
1 ball fresh di bufala campagna mozzarella
20 fresh basil leaves
Or personal choice of toppings...
100g pepperoni
100g Italian fennel sausage

My Five Families Marinara 
Heat the olive oil and gentle sauté the onions, garlic and red pepper for 10 minutes, add the rest of the ingredients and leave to a barely gently simmer for a couple of hours if you can, blitz to a smooth consistency and add more seasoning if required.

Cooking In A Wood Fired Oven
Fire up your wood oven at least 1-2hrs before you are ready to cook.  I like to have white glowing embers that only need a couple of logs periodically thrown on so that I can roughly control the temperature around 400 - 450 degrees Celsius.  I never cook straight away after throwing on a new log but as soon as the flames lower after five minutes or so then I gage how far to place the pizza in the oven, less flames then the pizza can go all the way in, hot fresh flames then cook your pizza nearer the oven door, position in the oven is how you can control the cooking heat.

If your cooking in a oven with a pizza stone pre heat your oven to its highest setting with the pizza stone in the oven for at least 45 minutes before your ready to cook.  The pizza should cook within 8 minutes, turn 180 degrees half way through the cooking time.

Don’t overload the pizza base with toppings for a truly magnificent pizza less is more, just make more pizzas.


17 Nov 2018

LO-DOUGH GLUTEN FREE PIZZA

San Marzano Chipotles en Adobo Pizza

Unbelievable that Lo-Dough has given a brilliant healthy high fiber option to those of us that really want to eat a healthy low glucose carbohydrate diet but still want that yummy treat without the heavy carb load.  Lo-Dough means you can have a grilled cheese toastie, breakfast egg and bacon muffin, quesadillas, tacos, nachos, wraps, burritos, chimichangas, pie, pasties, empanadas, sausage rolls, flat breads for stuffing with tandoori spiced chicken or Greek kebab and I have not even start to experiment with recipe ideas yet!

One generous wrap has 2.2g of Carbs, 9.3g Fibre, 0.1g Fat, 39 Kcal, Protein 2.6g and Salt 0.5g


Ingredients 
(serves 1)

1 Lo-Dough
1 tsp olive oil
1 cup mozzarella 
6 fresh basil leaves torn
2 tbsp marinara sauce (homemade recipe below)
1 tsp chipotles en adobo (homemade recipe below)

Pre heat your oven to 200 C / 400F, if you have a pizza stone place it in the oven to heat up, next heat a skillet medium hot brush the Lo-Dough with the olive oil and place in the hot skillet, toast each side for around a minute on each side, turn off the heat and remove the Lo-Dough from the skillet.  Top the pizza base first with the chipotles en adobo, then the marinara, sprinkle over the cheese and bake the pizza for 10-15 minutes until the cheese has browned a little and the crust is crispy, remove from the oven, sprinkle with fresh basil and enjoy.

My Five Familes Marinara
1 onion finely sliced
2 cloves garlic chopped
50ml olive oil
1 glass red wine
1 glass white wine
4 tins San Marzano tomatoes
1 tsp oregano
8 sprigs parsley stalks too
1 tsp paprika
1 tsp Himalayan sea salt
1 tsp fresh ground black pepper
1 bunch fresh parsley (optional)

Five Families Sauce
San Marzano tomatoes are grown on slopes in Italy opposite Mount Vesuvius, they are loaded with a beautiful sweet deep flavour and make a great marinara sauce.  Make the sauce earlier in the day and simmer gently for three hours, even better make the day before the depth of flavour will be gorgeous.  Heat the olive oil medium hot, add the onions and garlic and soften for around ten minutes, add the red wine and reduce by a third, add the white wine and reduce by half next add the tomatoes, oregano, parsley, paprika, salt and pepper, leave to gently simmer.

Chipotles en adobo Sauce
This fabulous slightly sweet smokey sauce adds great flavour to tacos, chilli, ragu’s, pasta sauces, pizza bases and of course chipotle mayonnaise 
25 dried chipotles stem removed
1 tbsp olive oil
1 onion finely diced
4 cloves garlic chopped
1 tbsp fresh oregano, 1/2 if dried
1 tsp fresh thyme 1/2 if dried
1 fresh bay leaf
1/2 tsp cumin seeds toasted, crushed
120ml white wine vinegar
25ml balsamic vinegar
1 tbsp tomato purée 
1 tbsp palm sugar
1/2 tsp Himalayan sea salt 

In a pan cover the chipotles with water and bring to a simmer, cook for 30 minutes until soft.  Remove the chillies from the pan and keep the flavoured simmering water.  In a blender blitz the onion and garlic, herbs, cumin, the softened chipotles along with 100ml of the simmering water, blitz to a paste.  Heat a pan, add the olive oil until hot, then the paste, fry for a couple of minutes stirring so as not to let the sauce catch on the bottom of the pan.  Add the vinegar, tomato purée, sugar, salt, bay leaf and 50ml of the simmering water to the pan stir in and simmer for another 10 minutes or so until you have a thick sauce.  Store in clean dry sterilised ball mason jar in the fridge.


15 Nov 2018

FRENCH HOT WATER CRUST PORK PIE

That indulgent magical time of the year is almost upon us where I get excited about all the gorgeous decedent sumptuous rich food I want to cook, eat and share with great friends and family, it’s a time for me where I push my culinary boundaries and learn new recipes among cooking my favourite comfort old family recipes and for me I get to cook with my old french game pie tin.

The Pork Pie...


The Pork Pie...
Organic raised loved and rootling pork seasoned with fresh sage and thyme from the garden and old fashioned mace. Home made jelly and a gorgeous hot water crust made with our own roast crackling rendered down lard this pie is a show stopper.  To jelly or not to jelly that is the question, I do both.


This is a all at once cook, we start by getting the jelly cooking first, while we're also making and cooking the pork pie, this is so that we can jelly the cooked pork pie and leave to set overnight in the fridge ready for the excitement of sharing, giving and eating with everyone the next day.

Ingredients 
(serves 6-8)

Hot Water Crust Pastry
600g strong plain flour
2 beaten eggs
7g Himalayan sea salt 
5g white pepper
1 tsp fresh chopped thyme
110g lard
110g butter
240ml water

The Pork Pie
800g pork shoulder diced
200g belly pork minced
200g bacon minced
10 sage leaves finely chopped
4 sprigs thyme chopped
1/2 tsp mace
1/4 tsp cayenne pepper
1 tsp Himalayan sea salt 
1 tsp black pepper

The Jelly
1 pork hock or 2 trotters
1 ltr water
1 onion skin on halved
1 carrot rough chopped
1/2 stick celery 
1 garlic clove bashed
8 peppercorns 
1 bay leaf
1 tsp mustard powder
1 pinch celery salt
2 leaves gelatine (optional) 

First get the jelly underway in a pressure cooker for 1/12 hrs or casserole dish for 3-4 hrs place all the ingredients in your pan, bring to a simmer and place on the lid, leave to cook for the time needed for your cooking vessel.  Once cooked remove the trotters or pork hock, the latter makes a wonderful dinner with some buttery vinegar mashed potatoes and pease pudding or a suet bacon and onion pudding roll.

Now to check if your pork jelly will set without the need for gelatine, which it should once cooled, place a saucer in the freezer for at least 30 minutes, take a tablespoon on the Cooke jelly stock and place on the cold saucer on your work top, leave for two minutes and assess the thickness of the set cooled jelly.  If too running then add the gelatine leaves by soaking in water to soften for 5 minutes and then stirring in off the heat.  Leave your jelly to one side while you bake the pork pie.

Next make the pork pie filling mix all the ingredients together and reserve to one side to infuse their flavours while you make the hot water crust pastry.

To make the hot water crust is really simple place the lard, butter and water in a saucepan and melt without allowing a simmer, in a large mixing bowl place the flour, salt and ribbon through the beaten eggs, make a well in the centre and pour in the hot lard and butter mix, using a spoon gently bring together until just combined, using your hand knead the mix for a minute until a smooth ish ball is formed.  Take 2/3 of the dough and place in your tin pressing the sides up and forming the base, place in your pork pie meat, lay your pastry lid on the top and crimp the edges, I like to take my left hand ready to pinch the pastry from the underneath of the tin lip and pastry, while my right hand will push the top pie crust pastry in to the two pinch fingers, this gives a great crust finish.  Make a hole in the centre of the pie and decorate with leaves.

Place the pork pie in a pre heated oven 200 C for half an hour, then lower the heat to 160 C for one hour, remove the pork pie from the oven and remove the french tin, glaze the sides with egg wash and place back in the oven to cook for a further 10-15 minutes.  Remove and allow to cool, stuff with your homemade jelly then allow the jelly to set in the fridge overnight, then your good to go, enjoy this glorious pork pie it is a outstanding pie.

10 Nov 2018

TANDOORI FIRE PIT CHICKEN

Girl Fire Food

I am in my true element when I cook over a wood fired pit, the flames add such flavour that can not be replicated any other way, and why would you!  Cooking over open flame always guarantees the most juiciest succulent moist chicken that wants to fall off the bone.  This chicken is elevated with a flavoursome tandoori spice rub that is great served with wood fired flatbreads, fresh mint yogurt and salad.

Prep time 10 minutes / Cooking time 1 hour 


Ingredients 
(serves 6)
1 large organic high welfare chicken
100g tandoori spice rub (homemade recipe below)

Rub the chicken inside and out with the tandoori spice rub generously and take to your pit to cook.  I keep my fire pit at around 180 C / 360 F, I keep a hotter fire pit area on the go at the same time and bring white hot logs over to the slightly cooler cooking fire allowing me to control the direct heat.  I turn the chicken every 10 minutes to ensure even cooking and creating the juices meat.  Once cooked, leave to rest in a warm place just off the heat from the fire pit for at least 30 minutes, then serve family style on the table with a pile of warm flat breads that you can cook while the bird is resting, bowls of minted yogurt, salad and mint seasoned onion salad.

Flatbreads 
(makes 6-8)
500g 00 caputo Italian flour
10g Himalayan sea salt 
50g extra virgin olive oil 
15g yeast
320g water


Place all the ingredients in a mixing bowl and either by hand or by machine with a dough hook mix for seven minutes, then dust a little flour over the dough mix and gently form into a ball, cover the bowl with a tea towel and leave in a warm area to prove for 1-2 hours until doubled in size if you want to use immediately, then other options are leave to prove slowly in the fridge for 24hrs, this is what I do as it gives me much more control over time and usage, this will keep for 48hrs in the fridge ready to go when you are, you can also freeze any left over dough at this stage, then when ready to use remove from the freezer defrost and once up to room temperature use as you would fresh.

 Take a oversized golf ball piece of dough, dust your work top with a little 00 flour, roll into a ball and roll out a large disk no bigger than your skillet if your not cooking in a wood fired oven, heat to a hot heat, place the flat bread in the pan and cook for one and a half minutes on each side, best served warm but are almost as good used later the same day, to use the following day dip the flat breads in water and pop in a pre heated oven for 3-5 minutes and Ta-Da almost as good as fresh.

BEST EVER CHEESE SCONE

Warm light crumbly melt in your mouth deeply satisfying cave aged cheddar cheese scones, on their own sumptuously delicious but these have gone to a whole other level being smothered with salty butter, fresh baked ham off the bone and warm brie, one scone is too much and will need a couple of attempts to finish, but watch out that flavour will have you going back for just one more bite!

Prep time 10 minutes / Resting time 30 minutes / Cooking time 20 minutes


Ingredients 
(makes 10 large)

160g cold salted butter
400g 00 flour
30g sugar
40g baking powder
200g double cream
220g full cream milk
300g aged cheddar grated
1 egg beaten for wash

Pre heat your oven 220 C / 440 F
Place your baking sheet in the oven, if you have a stone baking sheet even better.

In a large bowl rub the butter in to the flour to breadcrumbs, stir in the sugar and baking powder, mix in 90% of the cheese reserving a little to sprinkle on top of the scones, then whisk the milk and cream together and stir gently to combine, at this point I turn the rubble mix out on to the work top and bring together by gently pushing the dough together but keeping my actions light, once you have a large flattish mound fold the dough in half, turn 90 degrees and press out to the same thickness as when you started, repeat this 3 more times pressing out a little less each time, this action is folding the layers of dough and fat which will give your scones the most unbelievable crumbly light melt in your mouth texture, not dissimilar to a really good home made puff pastry, cover with a tea towel and leave to rest for 30 minutes.

Press out the dough to approximately 2” thick and using a circle cutter cut out the scones in a straight down and up action, do not be tempted to twist the cutter as this suppresses the rise of the scone while baking.  Remove the hot baking sheet from the oven place your scones on, don’t over crowd, cook in two batches if necessary.  Brush the tops with egg wash place a sprinkling of cheese on the tops of the scones, turn the oven down to 200 C / 400 F and bake the scones in the oven for 20 minutes until golden brown and a hollow sound when tapped on the bottom.

Remove from the oven and place on a cooling rack to cool for a few minutes, these are at their very very best served warm, if serving later wrap in a tea towel until needed and enjoy.

3 Nov 2018

ROASTED TOMATILLO SALSA VERDE


FANTASTIC FRESH ZINGY ZESTY SALSA VERDE
 
I love this super fast and so easy salsa verde because it packs a green fresh zingy zesty flavour that is super versatile.  Roasting the tomatillos adds a whole another depth of flavour.  I always have a fresh batch sitting around in the fridge ready for dipping with corn chips or to compliment, burritos, tacos, nachos, quesadillas, this salsa is also great as a sauce over chicken.  This sauce will keep for 5 days in a ball mason jar in the fridge but mine never lasts that long!

Prep time 10 minutes / Oven time 30 minutes 


Ingredients 
(makes 500ml approx.)
 
6 fresh green tomatillos
1-2 fresh green jalapeno chilli's
1 clove garlic
1 habanero chilli (instead if you want to pack a wahoo punch)
10 stalks of coriander 
1 large pinch of sea salt
1 small onion fine fine chopped

Heat your oven to 200 C / 400 F on a baking tray place the tomatillos, jalapeños and garlic and roast in the oven for around 30 minutes.  Remove from the oven and very simply place all the ingredients except the onion into a blender and blend or pulse until smooth, transfer into a bowl and add the onion, mix well and taste, adjust the seasoning if needed, chill before use.
 
If you want a dinner sauce cook the raw salsa before using to make a softer sauce for great chicken, steak and enchiladas.


CHICKEN POT PIE CAULIFLOWER PIE CRUST

Unbelievably Awesome

This is a winner winner chicken dinner!  Gorgeous crispy thyme cauliflower pie crust stuffed with creamy chicken and white wine pot pie filling, every spoonful is a hug of comfort that will have you going back for more.  I am a pastry lover who goes without, I miss my pie crusts and honestly I thought it was all about the pie fillings, but it is not, that crust is important.  This cauliflower crust left me in a tizzy state it was that good!  I won’t deny the first time I made these they were a little fiddly but then I found my groove and now knock them out quick and easy.

There are some quick short cuts to this recipe making it a speedy week night family supper but I like to prep like a pro and roast a chicken the day before, then remove all the meat from the bird ready for the pie filling, make my own chicken stock from the chicken bones left and then make the chicken pot pie filling a day ahead, you can skip this step if you buy a rotisserie chicken and stock on you way home.

Prep time 10 minutes / Cooking time 40 minutes


Ingredients 
(makes 1 large or 8 muffin tins)

The Pie Crust
1 large cauliflower 
1 tsp dried thyme
1 cup Parmesan grated
1 beaten egg

Chicken Pie Filling
2 tbsp olive oil
2 tbsp butter
1 onion finely diced
1 carrot finely diced
1 clove garlic chopped
1 rib celery finely diced
1 bay leaf
1 tsp thyme
150ml dry white wine
2 tbsp flour
1 ltr chicken stock
100ml double cream
1 cup peas
1/2 tsp Himalayan sea salt 
1/2 tsp white pepper
1/4 tsp black pepper
1 roasted chicken or 4 raw breasts diced

First make the cauliflower pie crust and whilst that is cooking I assemble the chicken pie filling.

Pre heat your oven to 200 C / 400 F.  To make the crust blitz the cauliflower in a food processor really fine, place in a bowl, add the Parmesan, thyme and beaten egg, mix well to combine.  Take your pie tin or muffin tin and place the cauliflower in to the tin press down then gentle using your finger push up the cauliflower until it reaches the top of the tin, then even out the crust all around the tin so that it is the same thickness all over.  Bake in your pre heated oven for 15-20 minutes until crispy.  Once cooked leave in the oven to cool while your making the pot pie filling.

If you also want to make pie lids make a ball with the cauliflower mix and press out to the size of the pie tin lid, place on a baking tray and bake for 15-20 minutes.

Heat the olive oil and butter medium hot, add the onions, garlic, celery, carrots, bay leaf and thyme, gently soften for around 10 minutes, half way through if your using raw diced chicken add now, if your using cooked or left over chicken add once the sauce is made.  Next make the roux by adding the flour to the mix and stirring in well, add the wine and stir in until smooth, next add half the chicken stock and cream, whisk until smooth, bring to a simmer and assess how thick your sauce is adding more chicken stock until your pot pie gravy is how you like it, add the peas season with salt and pepper and your ready to fill your cauliflower pie crusts.

Remove the pie crust from the oven and for ease you can fill the crust with the chicken filling, pop on the pie lid, brush the lid with egg wash and pop back in the oven for 10 minutes, when serving from the tin the crust will generally break but that does not affect the gorgeous taste.  If making individual pies gently remove the pie crust from the tin and place on your serving plates fill with the chicken pie mix and pop on the lids and serve.