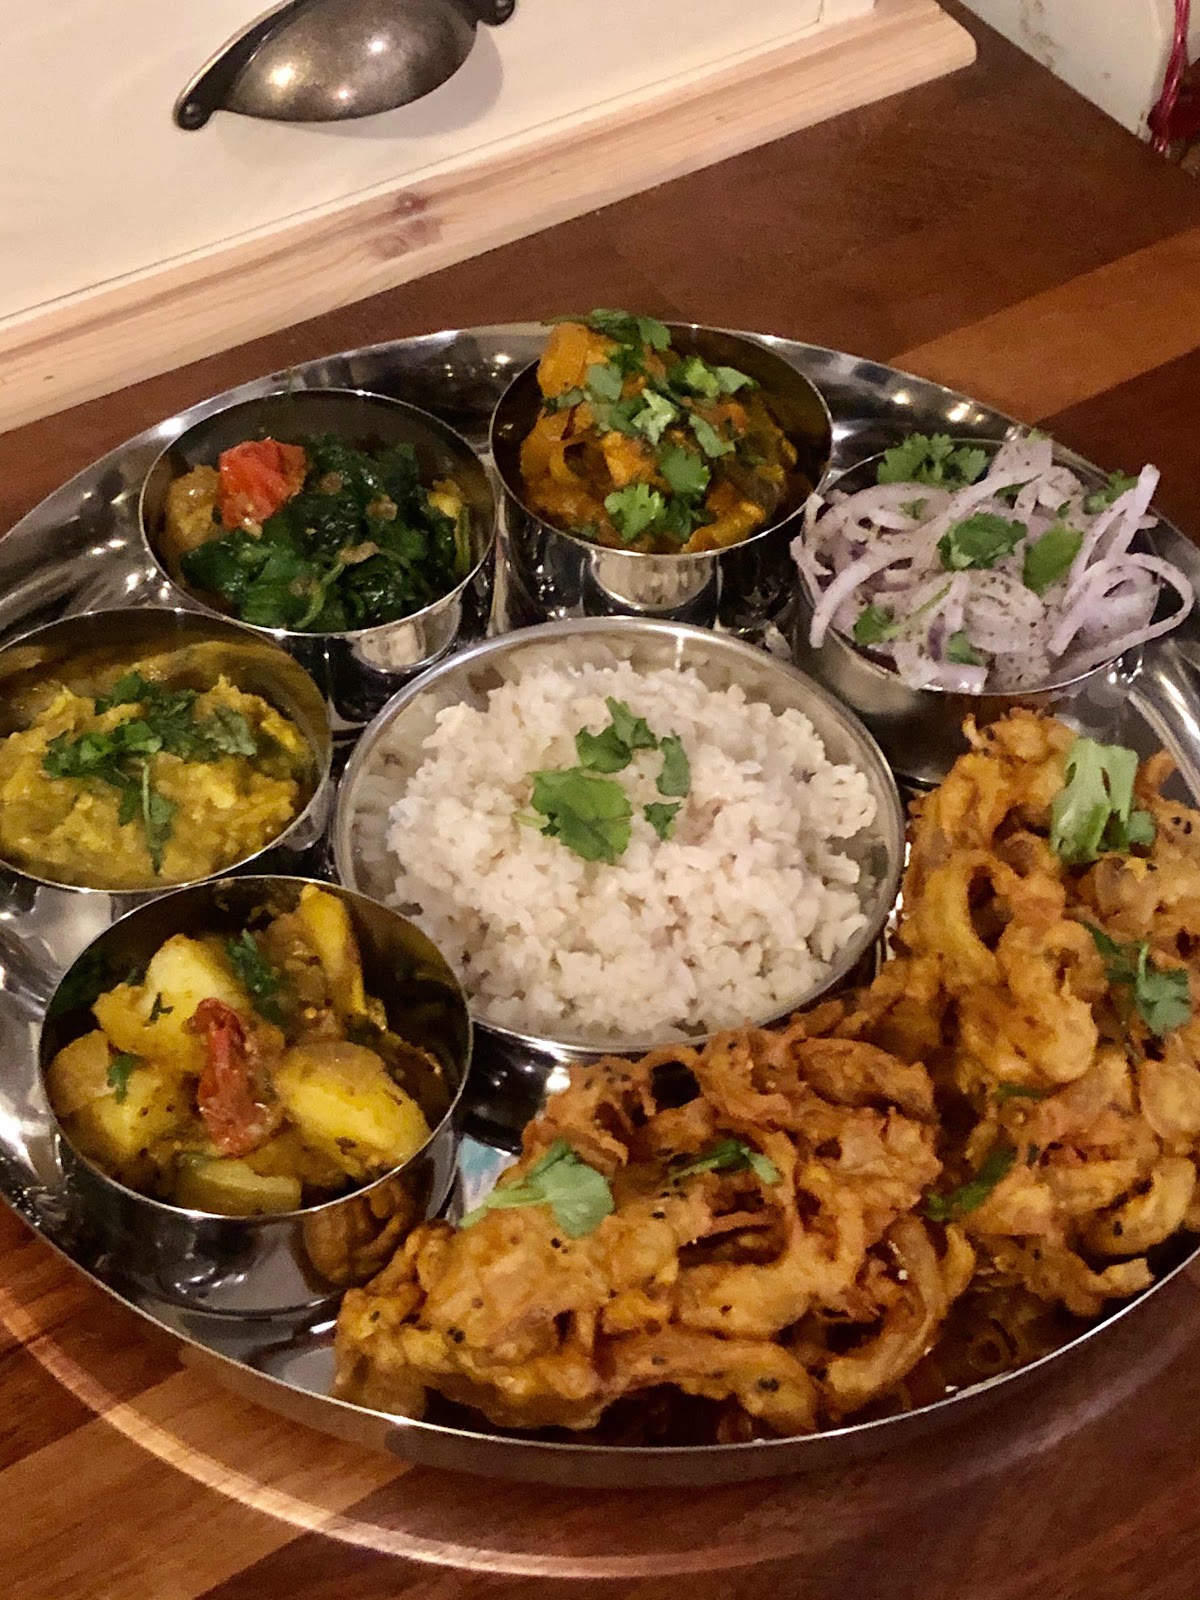
Outstandingly great way to serve and eat beautiful curry with lots of sharing dishes which makes this a great family social holiday meal, even better you get a whole mini buffet of gorgeous Indian food to enjoy, just pick your favourite five dishes, add pakoras, Indian paratha ghee layered breads and rice. On this occasion I choose Lamb Madras, Tarka Dhal, Bombay Potato, Sag Aloo, Onion Pakoras, Potato and Pea Samosas, Paratha Bread, Basmati Rice, Onion Mint Salad and mango chutney a glorious feast, as always make plenty so you have days of left overs or freezer stock for next time.
I always make over double each time and freeze the leftovers, this makes for a really easy takeaway dinner with minimal work for the next Thali dinner, I always make fresh Bombay potatoes, sag aloo potatoes, pakoras, rice and Dhal, but happily freeze raw paratha dough, curry and samosas. This halves the kitchen work out and in under one hour Ta Da a fabulous Thali Curry.
LAMB MADRAS
LAMB MADRAS
Ingredients
(serves 4-6)
Best Ever Curry Base Sauce
2 tbsp ghee
2 onions chopped
6 cloves garlic grated
2" ginger grated
1/2 red pepper diced
1/4 white cabbage chopped
1 carrot chopped
5 tomatoes chopped
1/2 cup tomato puree
1 tsp Himalayan sea salt
1 tsp ground coriander
1 tsp ground cumin
1 tsp ground fenugreek
1 tsp turmeric
1 tsp paprika
1 tsp garam masala
1 ltr water
1 kg leg of lamb diced
A one pot cook, heat a large deep saucepan medium hot, add the ghee, onions and garlic, soften for 7 minutes, then add all the other ingredients except the garam masala and 1 ltr of water or stock. Simmer for 20 minutes, then using a stick blender blitz to a smooth sauce, add the garam masala, that's the base sauce made this is now ready for the lamb, second layer of spices, finish spices and some unattended cooking time.
The Second Layer Curry Spice Mix
If your a preper like me you can do this stage a few days ahead, I will often place the base curry in a glass Pyrex dish, add the meat and second spice layer and leave to marinate in the fridge for a day or two giving me a make ahead dinner ready to go from the fridge to stove with no prep time.
1 tbsp Kashmiri chilli powder
8 fresh green chillies sliced longways
6 cardamom pods bashed
2 " ginger grated
6 cloves garlic grated
2 tbsp ground cumin
1 tsp ground coriander
2 tbsp mango chutney
1/2 juice lime
Fresh coriander
2 tbsp ghee
2 tbsp finishing spice powder mix
Finishing Spice Powder Mix
1 tbsp ground cumin
1 tsp turmeric
1 tbsp ground coriander
1 tbsp heaped curry powder
1 tsp paprika
1 tsp garam masala
Once your base sauce is blitzed, add the lamb, second layer spices except the fresh coriander, lime juice and mango chutney, then add the finishing spice powder mix, leave to gently bubble away for around 2 hours until the lamb is tender and will fall apart with a little pressure. That's it.
TARKA DHAL
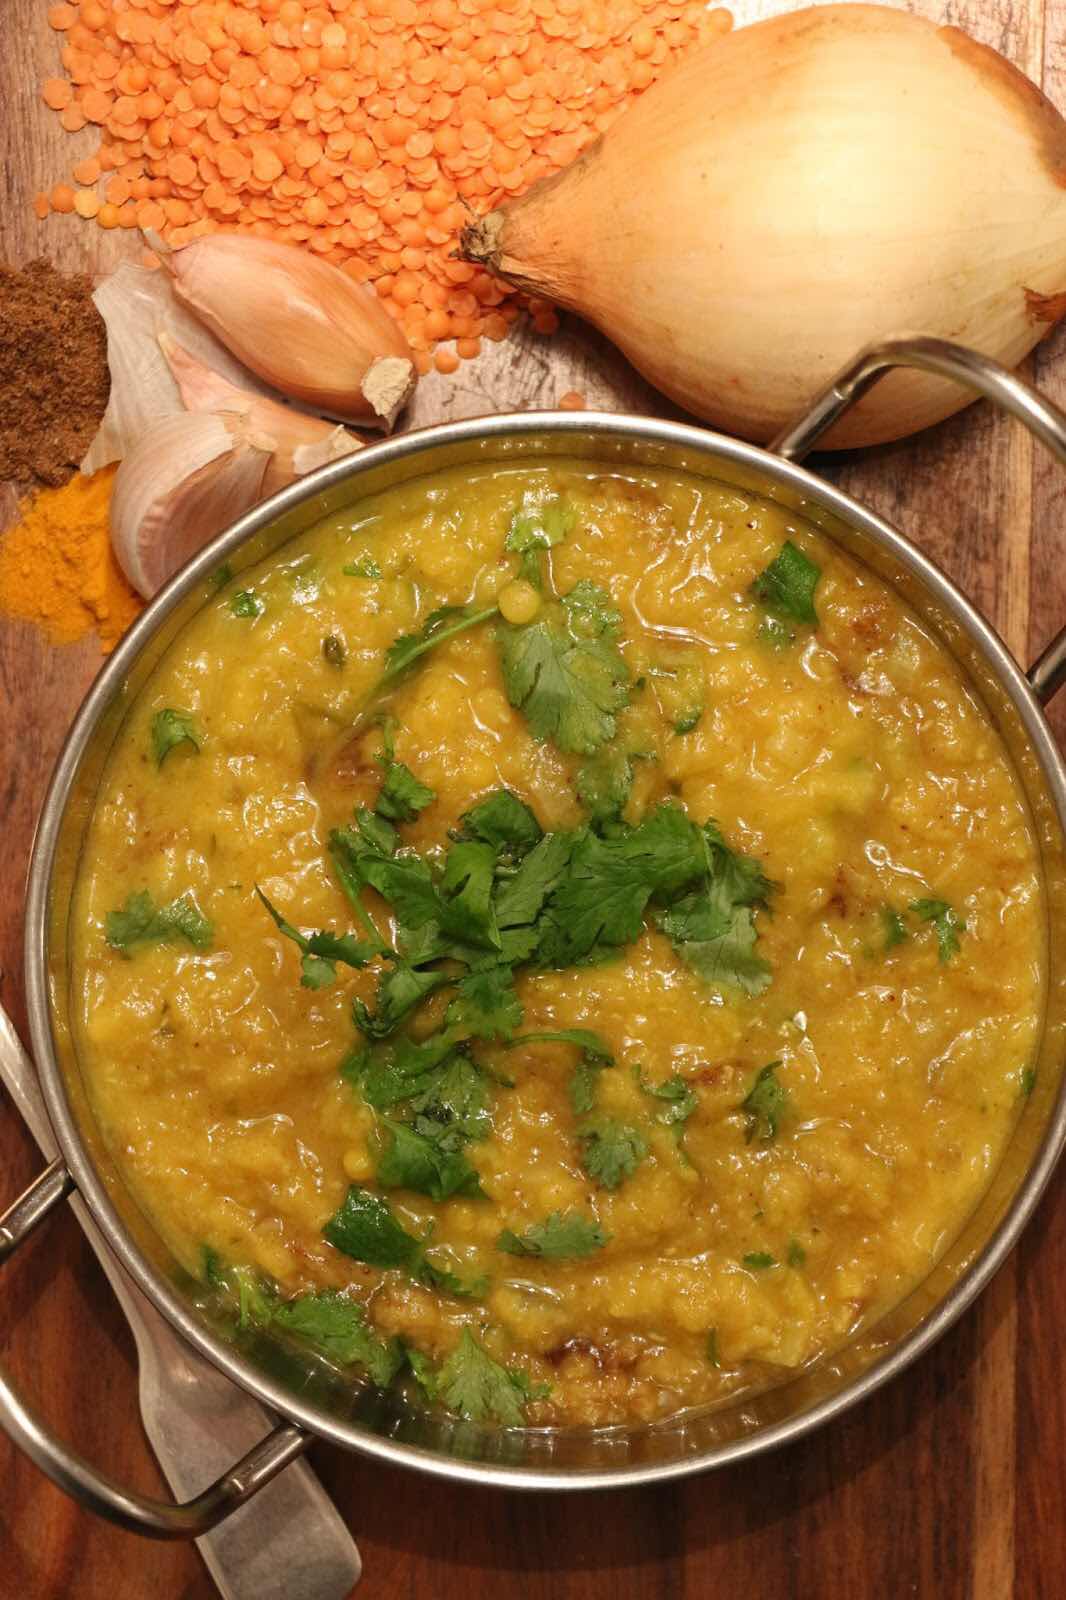
TARKA DHAL
One of my favourite dhals, I love the depth of flavour you get from adding the crispy nutty ghee fried garlic and fresh coriander with garam masala tarka at the end of the cooking, it really does make all the difference from a plain dhal to a sumptuous dish. I like to scoop this dhal up with ghee loaded parathas, they are basically a chapati that has been folded with ghee several times which renders them flaky and buttery just perfect with this rich dhal.
Ingredients
(serves 4)
The Dhal
1 cup of red lentils soaked
6 cups of water
1 tsp turmeric powder
1/2 tsp sea salt
1 tbsp coriander stalks finely chopped
The Tarka
8 fat cloves garlic sliced
1 small onion finely diced
1 tbsp ghee
1 small bunch coriander roughly chopped
1/2 tsp ground cumin
1 tsp garam masala
1 red chilli finely diced optional
Sea salt to taste if needed
1. Drain the lentils and place in a deep saucepan with the water and sea salt, bring to a simmer, pop on a lid and turn down to a low simmer and leave to cook for around 30 minutes, the lentils may need as much as 40 minutes, you are looking for a thick soft texture where all the lentils have cooked down and created a lovely dhal.
2. In a frying pan heat the ghee and gently fry the garlic until nutty brown, remove from the ghee and leave to one side while you next add the onion and fry until softened, add the garam masala, cumin turmeric mix well add back the garlic along with the chilli if using.
3. Add the tarka to the dal and stir in along with the fresh coriander and serve with some parathas for dipping scooping and stuffing.
BOMBAY ALOO

BOMBAY POTATO ALOO
2 tbsp ghee
3 King Edward potatoes cubed
1 tbs ghee
1 tsp cumin seeds
1 tsp turmeric powder
1/2 tsp black mustard seeds
1/2 tsp yellow mustard seeds
30 ml water
Salt & pepper to taste
1 tsp curry powder
FINAL TOUCH
chopped coriander
1/2 tsp garam masala
In a pan melt the ghee and toss the potatoes, stir cooking for approx 7 minutes, add all the spices and stir well, when the spices start to stick on the pan add the water, place on a lid and turn down the heat, simmer for 15 minutes, after 10 minutes add the cook on for the last 5 minutes. Add the coriander and garam masala, taste and adjust the seasoning if needed to taste.
SAG ALOO

SAG ALOO
2 tbsp ghee
3 King Edward potatoes cubed
1 tbs ghee
1 tsp mild curry powder
1 tsp cumin seeds
1 tsp turmeric powder
1/2 tsp black mustard seeds
1/2 tsp yellow mustard seeds
150ml water
Salt & pepper to taste
1 tsp curry powder
FINAL TOUCH
1 cup fresh spinach
chopped coriander
1/2 tsp garam masala
In a pan melt the ghee and toss the potatoes, stir cooking for approx 7 minutes, add all the spices and stir well, when the spices start to stick on the pan add the water, place on a lid and turn down the heat, simmer for 15 minutes, after 10 minutes add the cook on for the last 5 minutes. Add the coriander and garam masala, taste and adjust the seasoning if needed to taste.
PARATHAS
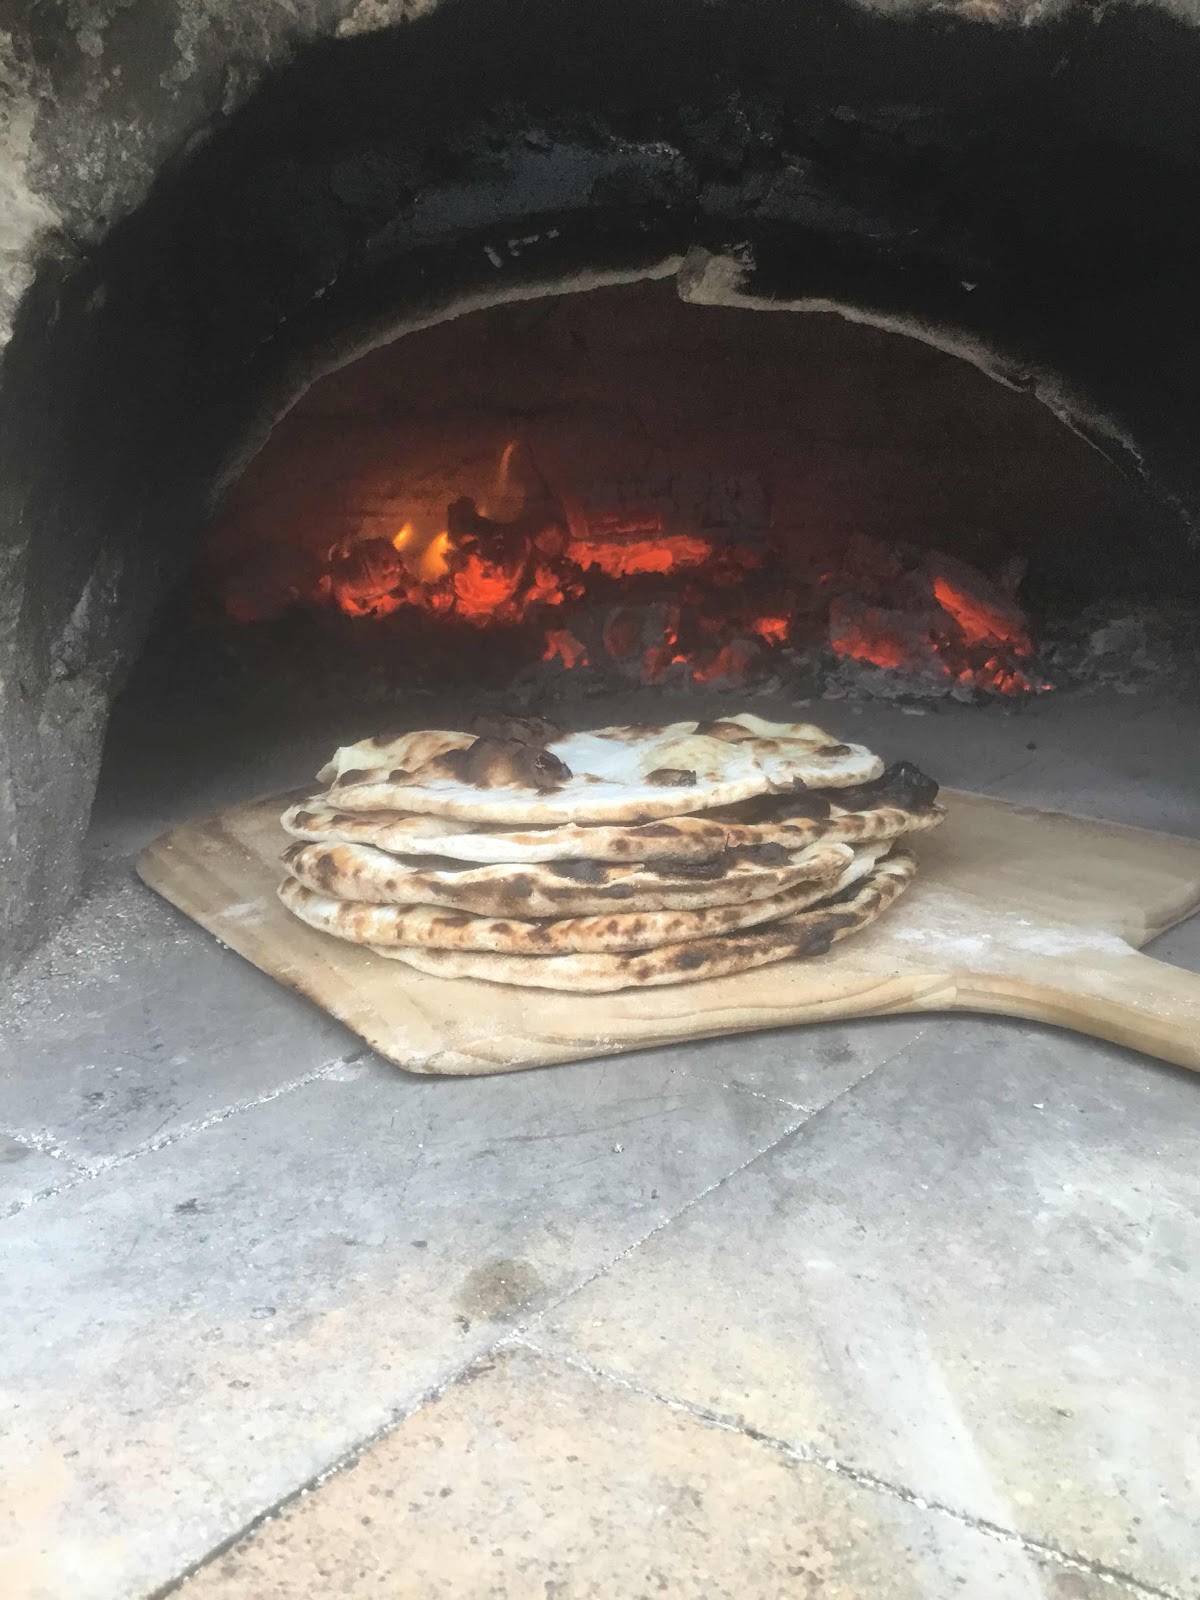
Parathas
Ingredients
(makes 8)
250g chapati flour
1/2 tsp sea salt
150g melted ghee
130ml water
1. Place the chapati flour, sea salt and melted ghee in a bowl, using your fingers in a bird like pecking action peck the ghee in to the flour, just a French way or rubbing in but less rub equals more lift in the puff of the pastry/bread.
2. Add some of the water and a little more if needed until you have a soft not sticky dough, knead for a couple of minutes and then cover and leave for 10-15 minutes.
3. Divide the dough in to 8 balls and then roll out to a nice thin circle, brush with melted ghee and fold in half, brush with melted ghee again and fold in half again, you now have a triangle, brush this with ghee and fold in half again then tuck the sides under and form back in to a rough ball, roll out to a 5-6 inch circle.
4. Heat a skillet to a high hot heat and brush the paratha with butter and place in the pan, cook for a couple of minutes, brush the top of the paratha with melted ghee and turn over cook for a further 1-2 minutes, wrap in a warm tea towel until needed.
PAKORAS

ONION PAKORAS
1 large Spanish onion
1 tsp curry powder
1/2 tsp turmeric
1/2 tsp sea salt
1/2 tsp white pepper
2 fresh chillies chopped
1 hand full fresh coriander chopped
1 cup chic pea flour
100ml water
400ml nut oil to cook with
If you have time sprinkle the sea salt over the sliced onions a hour ahead of time, this releases liquid from the onions and makes a better more flavoured pakora batter.
Place all the nut oil in a pan and bring up to a medium hot heat, 170-180 C, meanwhile in a large mixing bowl add all the ingredients except the water and coat the onions with the chic pea flour, add most of the water and stir to combine, you want a thick batter consistency, add a little more water if needed.
Scoop up a large golf ball size and shape in to a firm ball using two spoons, gently place the pakora in the oil and fry for around 2 minutes on each side, turning only once. Remove and place on kitchen paper to drain, repeat with the rest of the mixture, you can cook more than one at at time, just don't overload the pan or the temperature will lower and the pakoras will soak up oil and be greasy.
PEA POTATO SAMOSA
Watch out these are so delicious a thin buttery flaky pastry like you've never had before stuffed full with a gorgeous pea and potato spiced curry will have you sneaking three or four more on your plate! The pea and potato curry is outstanding in its own merit as a great main meal or side.

SAMOSAS
150g plain flour
40g ghee
1 tsp sea salt
60ml water
Pea and Potato Curry
Stage One
Mustard Oil Fried Potatoes
1 tbsp ghee
50ml mustard oil
1 large potato diced
1 tsp turmeric powder
Stage Two The Sauce
2 tbsp ghee
1 small onion finely diced
4 cloves garlic finely diced
1 cup petit pois peas
1 tsp cumin seeds ground
1 tsp kashmiri powder
1 tsp ground coriander seeds
1/2 tsp turmeric powder
2 red chillies finely chopped
1/4 tsp asafoetida
1/2 juice lime
2 large tomatoes skinned chopped
1/2 tsp sea salt
1 tsp garam masala
2 tbsp chopped coriander
The Frying
2 ltrs ground nut or olive oil
Paper roll for draining
1. First bring a pan of seasoned water to a boil and add the diced potato, par boil for approx 8-10 minutes until tender, drain and reserve to one side. I like to drain the water back into another pan so that I can use the same hot water to heat the peas, a little help for the environment. I like to make the next two methods at at the same time.
2. Mix the salt in with the flour, rub in the ghee and then add the water and bring the dough together, knead for a 5 minutes and leave to rest for 1 hour if you can.
3. Heat a large skillet with the ghee and mustard oil when medium hot add the potatoes and fry until slightly crispy and lightly golden all over add the turmeric and stir through, remove the potatoes from the pan and reserve to one side. Keep the pan for the sauce, do not wash up!
4. In the same pan heat the ghee and then gently soften the onions and garlic in the ghee for 5 minutes or so, then add the spices, the cumin, kashmiri, coriander, asafoetida and turmeric and fry for a couple of minutes.
5. Then add the tomatoes, peas, sea salt and lime juice and cook for a further 10 minutes add the potatoes back in along with the the garam masala, taste and adjust the season if needed, leave to one side to cool while you make the pastry.
6. Heat the oil to 180 degrees C 356F
7. Now to make the samosas, divide the dough in to half and then each half in to 4, roll in to balls and roll out each ball in to a circle. Cut the circles in half. Brush some water around the edge of the half circle and taking the corner of the straight edge of the pastry fold it over to the centre of the curved side.
This will now look almost like a diamond shape. Press the two edges together and you will now find you have a pocket that you can stuff with the pea and potato curry!
To seal the samosas fold over the top flap of the pastry on top of the pocket and seal the edges. If you find it difficult stuffing then you can place the filling on the half circle of pastry and fold the pastry over the filling and seal that way.
8. Fry for around 3-5 minutes until light and golden in colour and enjoy these are just delicious.
MINT ONION SALAD
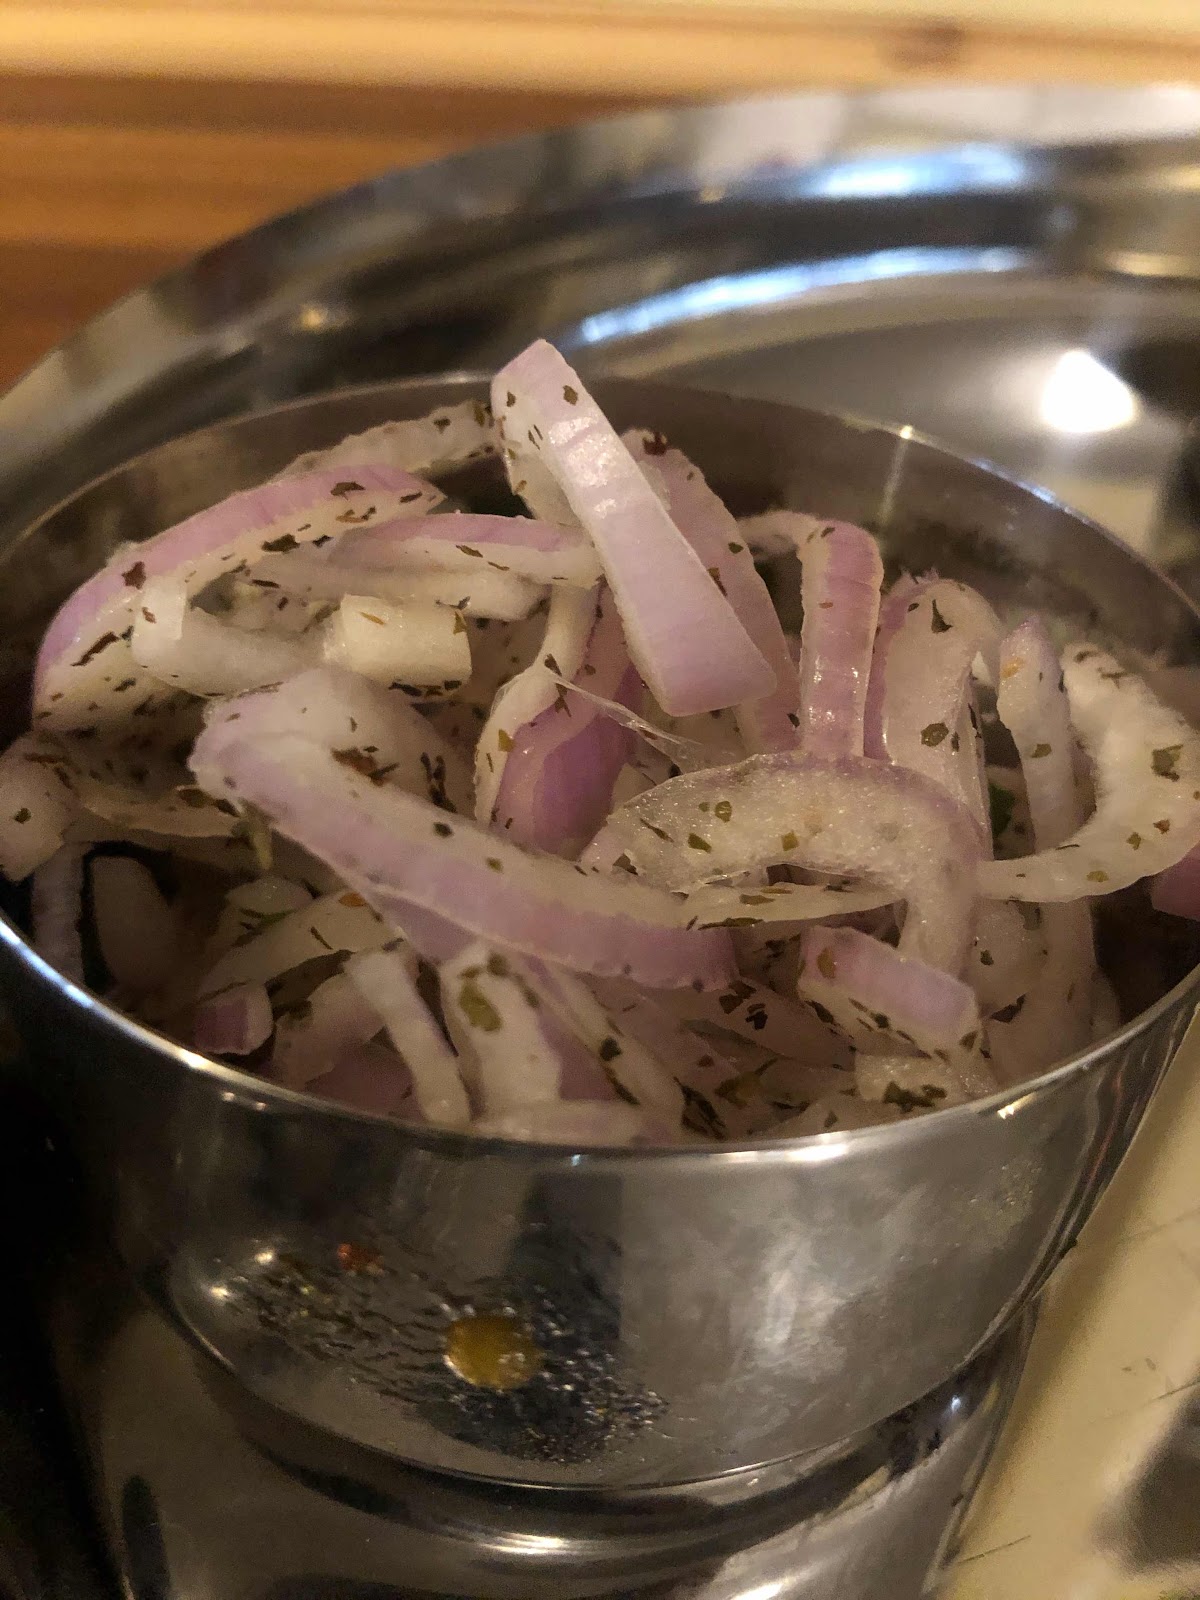
Simply slice mild red onions and toss with dried mint.
Perfect Rice
2 cups of basmati rice
4 cups of water for the rice
Rinse the rice in a sieve and place in your pan along with the water, pop on a lid and bring to a simmer, turn down the heat to a low simmer, under no circumstances take the lid off or stir the rice! Simmer for 6 minutes and then with out touching the lid ! take the rice off the heat and leave to one side, the rice will be ready in another 5 minutes but will be good to stand and stay hot for at least 10 minutes. That’s it perfect fluffy rice every time!